
Did you know Excel can import your Facebook data? If you have a Facebook page or personal profile you can easily import your data with Power Query to gain valuable and interesting insight about your friends and followers.
Just a reminder, that in Excel 2010 and 2013 Power Query is an add-in and you can find out how to install it here. In Excel 2016 it comes pre-installed under the Data tab in the ribbon and is called Get & Transform.
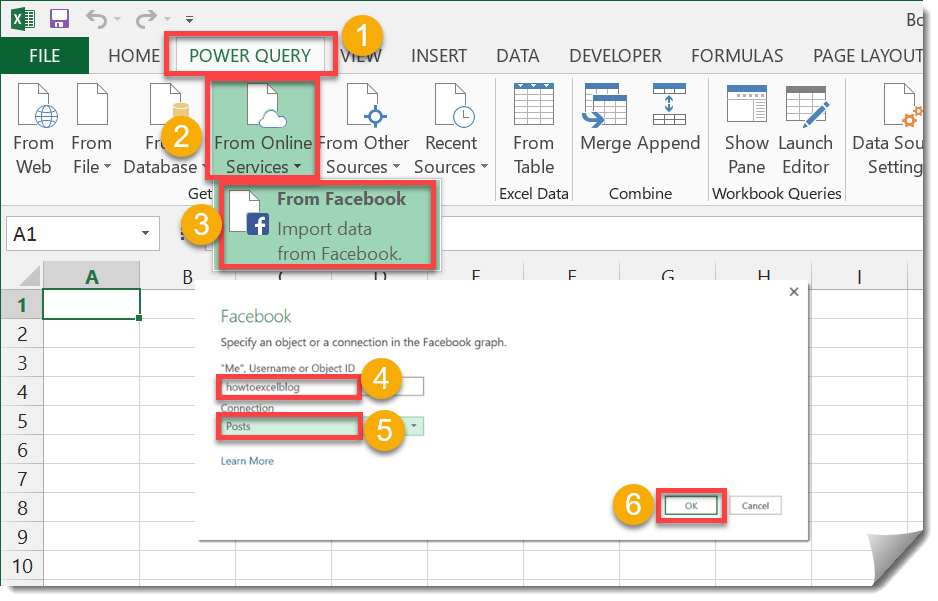
Create a Facebook Power Query.
- Go to the Power Query tab in the ribbon.
- Under the Get External Data section select From Online Services.
- Select From Facebook.
- Specify the object you’re connecting to.
- To connect to your Facebook page, type the name of it here. For example my Facebook page is https://www.facebook.com/howtoexcelblog/ (shameless plug, you should follow it for great tutorials like this one) so I have entered howtoexcelblog.
- To connect to your personal profile, just type Me.
- To connect a group enter the ID number found in the URL, it should look something like this https://www.facebook.com/groups/99999999999/ just copy in the number part.
- Select your connection type, you can choose from things such as comments, friends, likes, posts etc…
- Press the OK button.
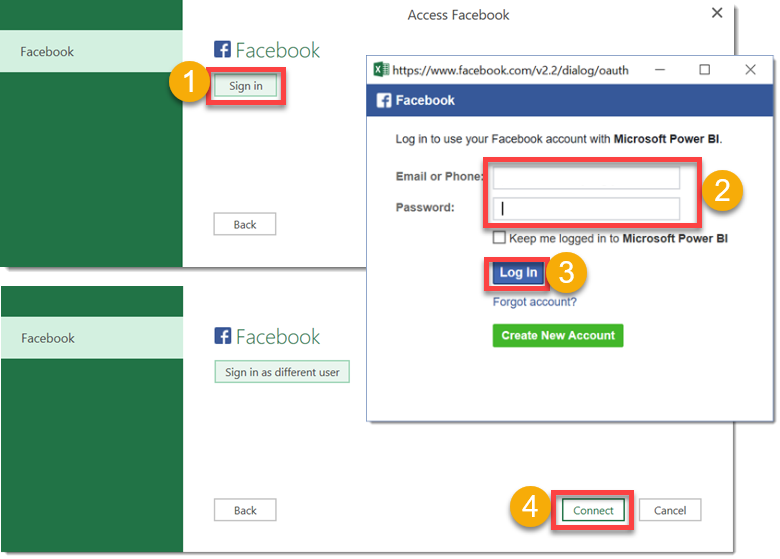
If you’re connecting for the first time, you’ll need to sign into your Facebook account.
- Press the Sign in button.
- Enter your log in credentials (email and password) for the Facebook account you want data from.
- Press the Log In button.
- Press the Connect button.
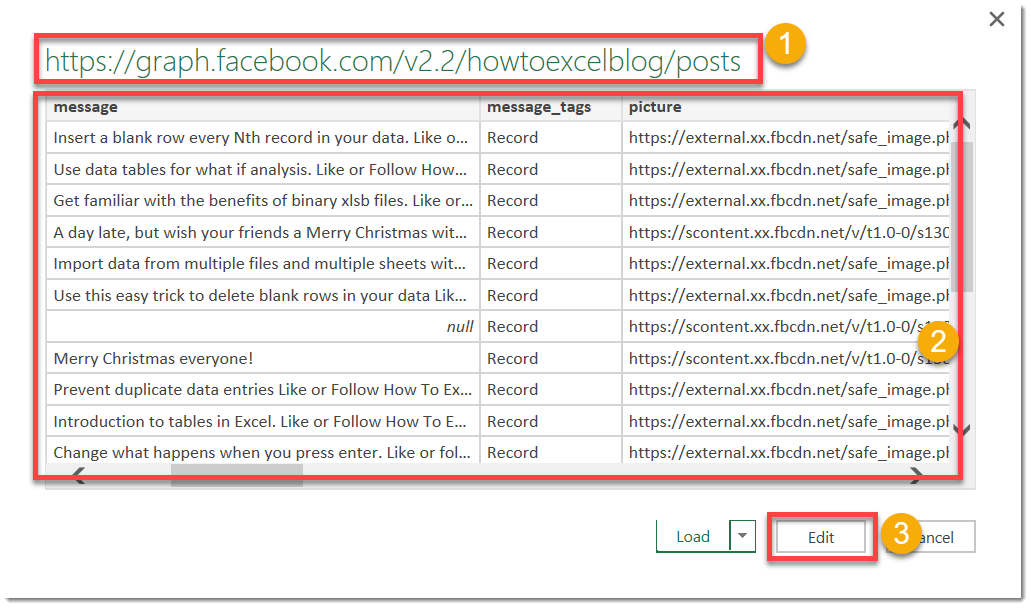
The preview query.
- The connection will be displayed at the top.
- A preview of the data is shown.
- Press the Edit button to edit the data as desired before importing.
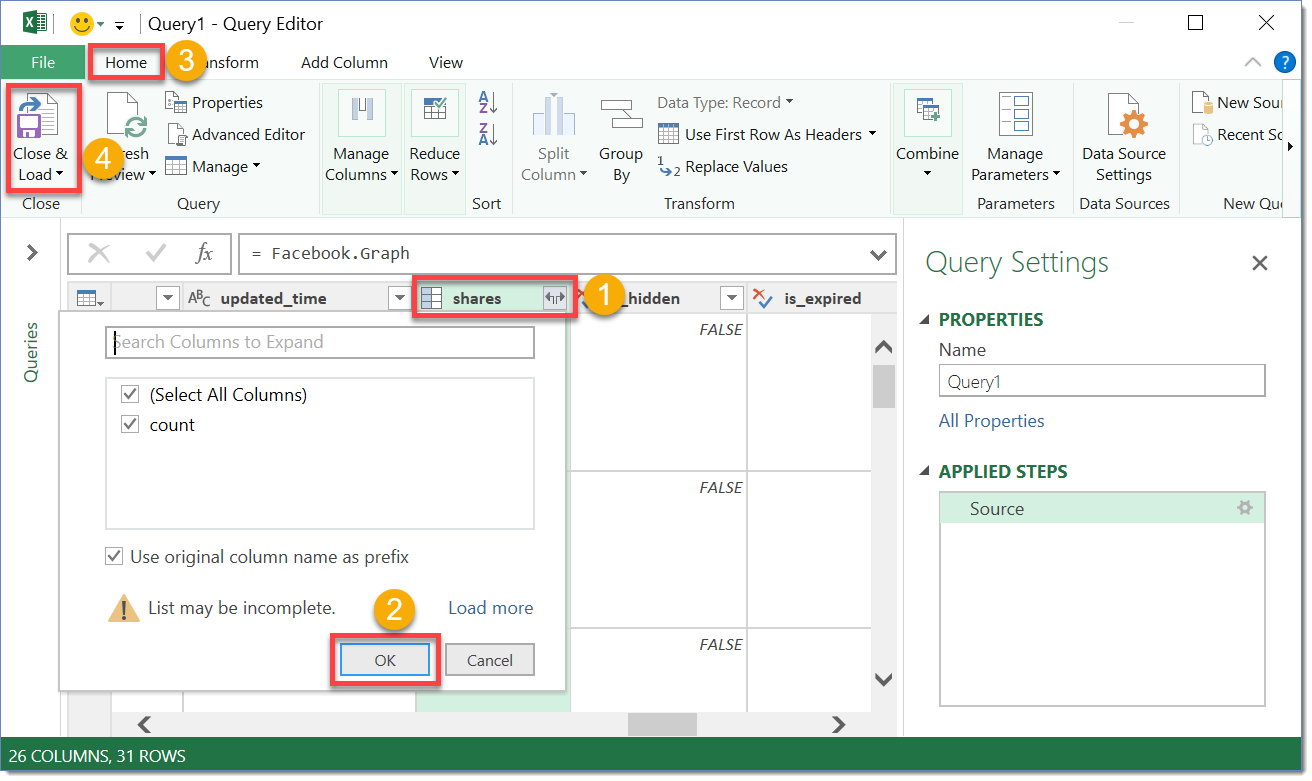
In the Editor you will be able to expand columns with a double arrow icon in the right hand corner of the column heading to reveal more data.
- Click on any double arrow icon in the column heading to expand the data.
- Press the OK button to expand the column.
- When you’re finished editing the query, go to the Home tab in the ribbon.
- Press the Close & Load button.
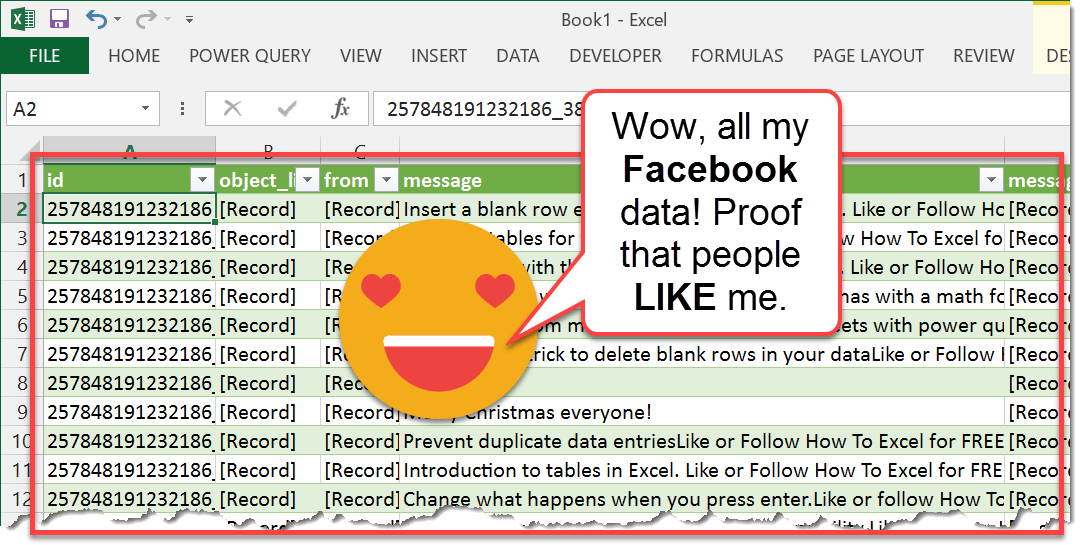
Now you can analyse your Facebook data until you feel all warm and fuzzy inside, so many likes 🙂


0 Comments