
What Is The Formula Bar?
The Formula Bar is where data or formulas you enter into a worksheet appear for the active cell. The Formula Bar can also be used to edit data or formula in the active cell.
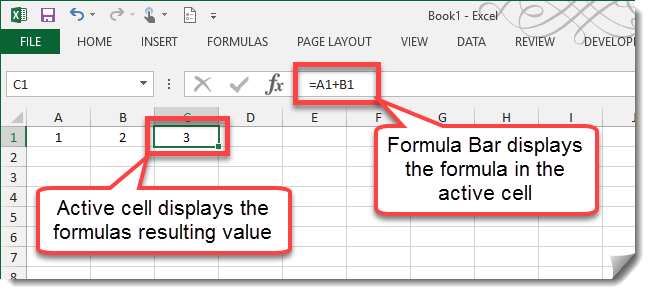
The active cell displays the results of its formula while we see the formula itself in the Formula Bar.
Expanding Or Contracting The Formula Bar
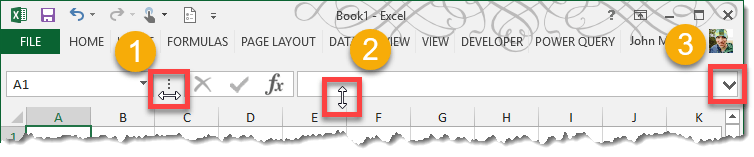
The Formula Bar can be expanded either vertically or horizontally depending on your needs.
- To expand the Formula Bar horizontally, move the mouse cursor to the area between the Name Box and the the Formula Bar until the cursor turns into a horizontal double ended arrow. Left click and drag to adjust the horizontal size.
- To expand the Formula Bar vertically, move the mouse cursor to the bottom of the Formula Bar area until the cursor turns into a vertical double ended arrow. Left click and drag to adjust the horizontal size.
- On the right hand side of the Formula Bar there is a expand or contract toggle. Use this to quickly adjust the Formula Bar.
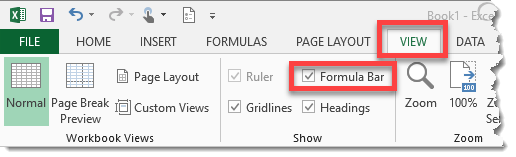
You can also hide the Formula Bar entirely by going to the View tab and uncheck the Formula Bar option.
Entering And Editing Data In The Formula Bar
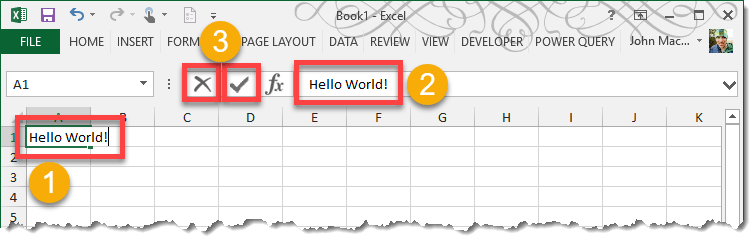
Enter data into any cell.
- Select the cell where you want to enter your data and start typing.
- As you type the data notice the data also appear in the Formula Bar.
- To accept the data either click the Check Mark or press Enter. To discard the data either click the X or press Esc.
The process for entering a formula is the same except all formulas need to start with “=” (without the quotation marks). To edit any data and formula in any cell, select the cell and either click into the Formula Bar or press F2 to enter editing mode.
The Insert Function Dialog Box
If you’re not familiar with what functions Excel offers, then the Insert Function dialog box is a great way to learn what functions are available, what they do and how to use them.
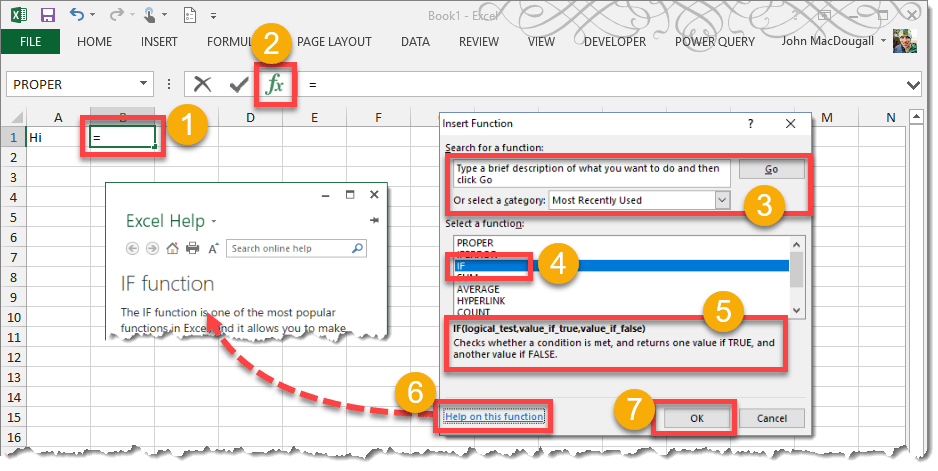
Insert Function dialog box.
- Select a cell where you want to enter a function.
- Press the Insert Function icon.
- You can search for functions by typing in keywords and pressing the Go button, or select functions based on category using the drop down menu.
- Select a function.
- View the brief description of what the function does.
- Click the Help on this function to read more about the function and see examples in Excel’s help menu.
- Press the OK button.
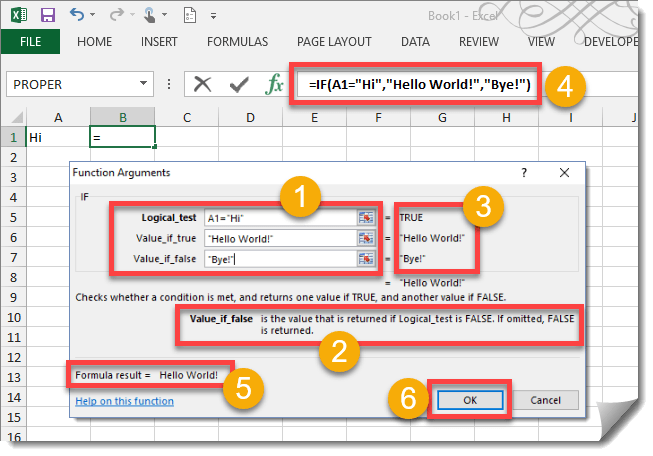
Function Arguments dialog box.
- Fill in the various argument parameters for the function. Use the right hand range selector icon to select a cell or range from the workbook as input.
- As you click on the different function argument parameters, a brief description of it will appear.
- The value of your inputs appear to the right of the inputs.
- Notice as you enter items into the inputs, the formula bar builds your function.
- Here you can see the output that will be returned from the function. This is what will be visible in the worksheet cell.
- Press the OK button to enter the function.


![6 Ways to Count Colored Cells in Microsoft Excel [Illustrated Guide]](http://cdn-5a6cb102f911c811e474f1cd.closte.com/wp-content/uploads/2021/08/Count-Coloured-Cells-in-Excel.png)


0 Comments