
Power query is a great tool built by Microsoft that will help you work with data in Excel. This tool is great for connecting to various external data sources, querying and transforming data, or cleaning and parsing data.
- Web pages, Facebook
- Excel, CSV, XML, Text or Hadoop (HDFS) Files
- A Folder
- Various databases like MS Access, SQL Server, MySQL, Microsoft Azure SQL, Oracle, IBM DB2, PostgreSQL, Sybase, Teradata, OData etc…
This is available as an add-in for excel 2010 professional plus or 2013 and comes already built in for Excel 2016.
You can download Excel Power Query here from Microsoft.
Unfortunately, if you’re not running Excel 2010 professional plus or 2013, then you will need to upgrade to Excel 2016 in order to use this feature as it’s not available for previous versions of Excel. Mac user are also out of luck.
There are both a 32-bit and 64-bit versions and which one you choose will depend on the version of Excel which you have installed.
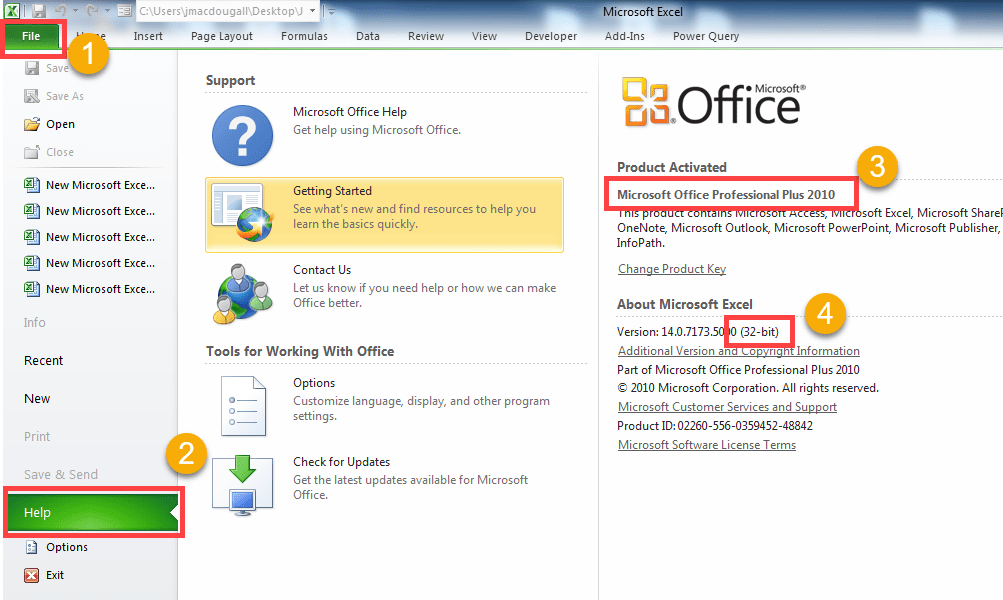
Excel 2010
To check what version you have:
- Go to the “File” tab.
- Go to the “Help” section.
- Here you will see the product version, if it says professional plus 2010, then you’re in luck.
- Here you will either see 32-bit or 64-bit. Take note and download the correct Power Query add-in version accordingly.
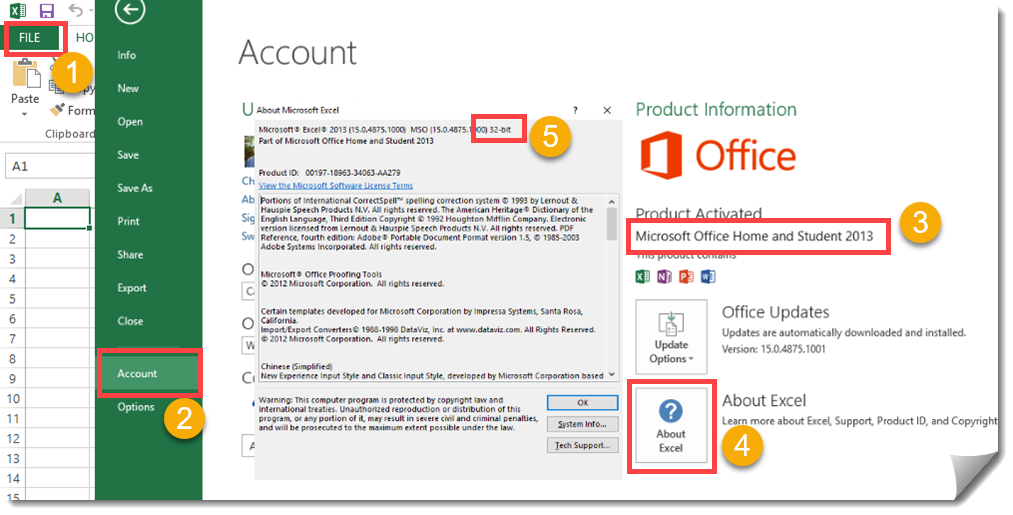
Excel 2013
To check what version you have:
- Go to the “File” tab.
- Go to the “Account” section.
- Here you will see the product version.
- Click on the “About Excel” button.
- In the screen that pops up, at the top you will either see 32-bit or 64-bit. Take note and download the correct Power Query add-in version accordingly.
Excel 2016
Power query comes pre-installed in Excel 2016 but has been renamed to “Get & Transform” and is under the Data tab in the ribbon. If you have Excel 2016, then you don’t need to do anything to use it.
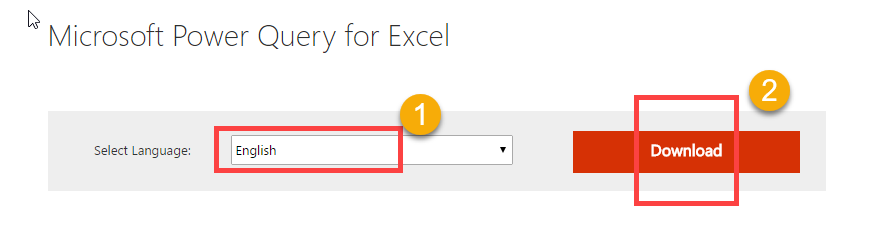
Download The Add-In
Go to the Microsoft website:
- Select your preferred language.
- Click the download button.
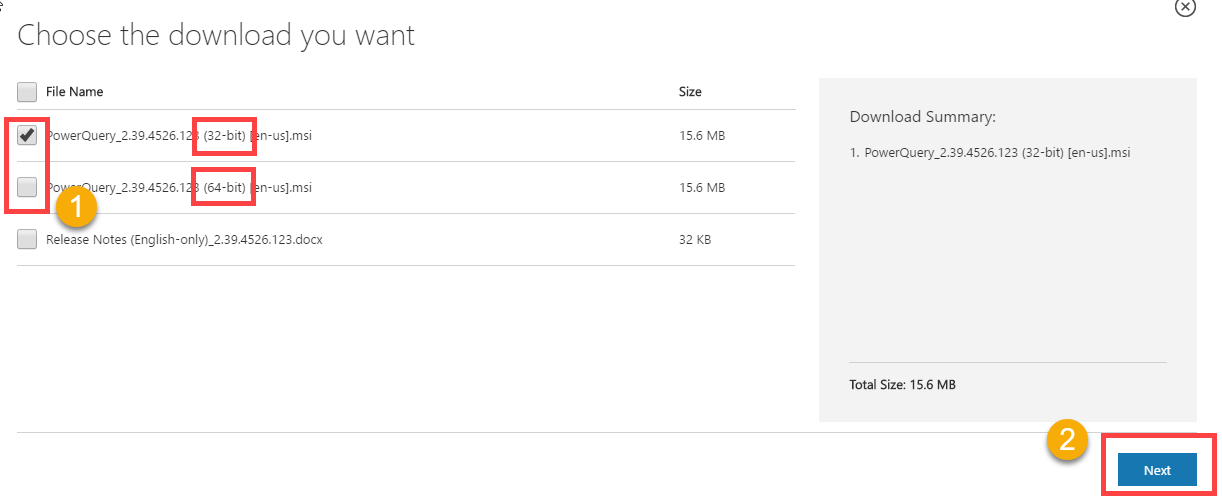
Select The Correct Version
- Select either the 32-bit or 64-bit version depending on your version of Excel.
- Click the next button.
Run The Setup Wizard
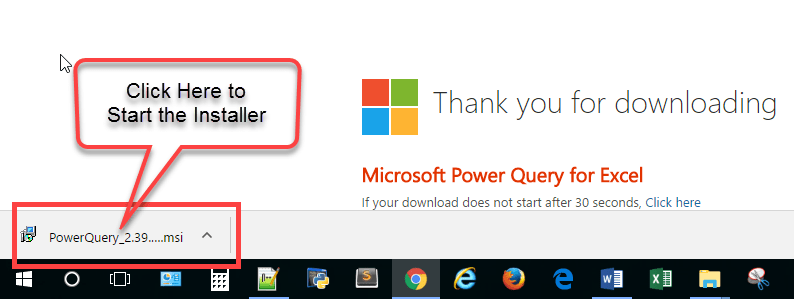
Make sure Excel is closed and then click the download from the download bar from your browser.
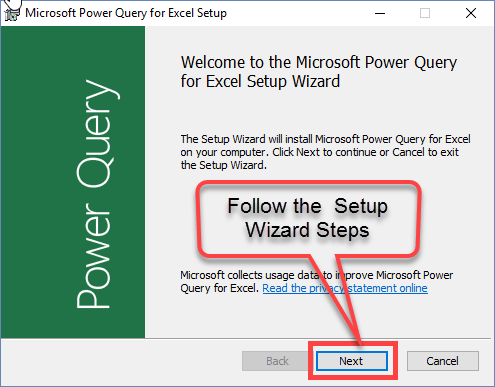
Follow The Setup
Follow the steps in the Setup Wizard.
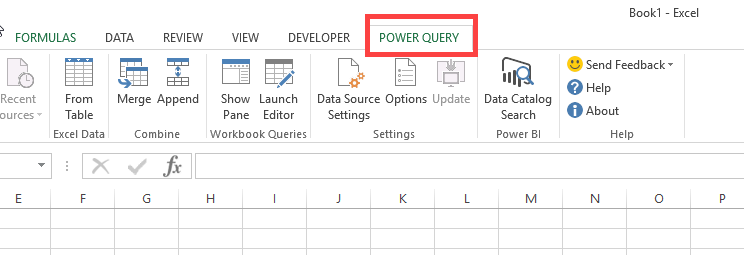
Power Query Is Now Ready To Use
Now the next time you open up Excel, Power Query will be available to use under its own tab.


0 Comments