Do you want to make impressive looking and functioning Excel workbooks without too much effort?
Of course you do!
If you want to create interactive dashboards in Excel and visually explore your data, then you need to start using slicers and timelines.
They’ll really take your workbooks to the next level… and they’re easy!
In this post, we’re going to learn everything there is to know about slicers and timelines in Microsoft Excel.
There’s a lot to cover, so let’s get started.
What Is A Slicer In Excel?
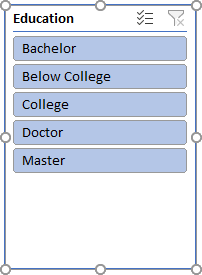
A slicer is an object in Excel that allows you to filter your data.
It displays all the possible values from a selected column of your data and each value will display as an individual button inside the slicer. The buttons can be used to toggle the active filtering of your data set.
The slicer object floats above the spreadsheet grid and will always be visible and available to use.
Slicers can be used with both Tables and PivotTables.
What Is A Timeline In Excel?

Timelines are like slicers. They allow you to filter your data using a visual interface, but they are specifically for use with date fields.
They allow you to easily filter on ranges of dates by days, months, quarters or years. The dates appear in a horizontal line going from oldest to newest as you go from left to right on the timeline.
Timelines are only available for use with date fields in PivotTables.
What Versions Of Excel Have Slicers And Timelines?
Slicers were introduced in Excel 2010.
- Excel for Office 365 or Excel 2010 and later versions will have Slicers for pivot tables.
- Excel for Office 365 or Excel 2013 and later versions will have slicers for tables.
- Excel for Office 365 or Excel 2013 and later versions will have timelines for pivot tables.
Previous versions of Excel will not have slicers or timelines.
How To Add A Slicer To A Table
Your data will need to be inside a proper Excel table. You can create an Excel table by selecting a cell inside your data ➜ going to the Insert tab ➜ Table.

Once your data is inside a table, a new contextual tab will appear. Go to the Table Design tab ➜ Insert Slicer.

This will open up the Insert Slicer menu and you’ll be able to choose fields in your data for which you want to add a slicer.
You can select one or more fields from the list to create multiple slicer objects at once. You’ll be able to use them simultaneously to filter data based on multiple fields at the same time.
Press OK, and Excel will create the slicer objects for you.
How To Add A Slicer To A PivotTable

Select the pivot table to which you want to add a slicer ➜ go to the PivotTable Analyze tab ➜ Insert Slicer.
You can then select which fields to add and press OK. Excel will then create the slicer object to control the pivot table.
How To Add A Timeline To A PivotTable

Select the pivot table to which you want to add a timeline ➜ go to the PivotTable Analyze tab ➜ Insert Timeline.
Add A Slicer Or Timeline From PivotTable Fields List
Alternatively, you can add a slicer or timeline to a pivot table from the PivotTable Fields window.

Right click on the field which you want to add a slicer for ➜ then Add as Slicer or Add as Timeline.
The result is the same as adding the slicer or timeline from the ribbon, it just might be more convenient sometimes.
Using A Slicer

Using a slicer is easy and there are a couple different ways to select items.
Select A Single Slicer Item
To select a single item in a slicer, you can click on the item. This will filter your data to only show data for that item.
Select Multiple Adjacent Slicer Items
To select multiple adjacent items in a slicer, click on the first item then drag the cursor to the last item and release the click. This will filter your data to only show the selected items.
You can also use the Shift key to select multiple adjacent items. Click on the first item then hold the Shift key and click on the last item.
Select Or Unselect Multiple Non-Adjacent Slicer Items
You can use the Ctrl key to select or unselect multiple items in a slicer. Hold the Ctrl key and click on any items you want to select or unselect.
Enable Slicer Multi-Select Mode
There is an option to enable a multi-select mode for a slicer so you don’t have to hold the Ctrl key. Click on the multi-select icon in the upper left hand corner of the slicer to enable multi-select.
This can also be toggled on or off with a keyboard shortcut. With the slicer selected, press Alt + S on your keyboard.
Clear Selected Slicer Item Filters
You may want to reset your slicer and clear out any applied filtering. This can be done using the filter icon in the top right corner of the slicer.
Clearing filters can also be done with a keyboard shortcut. With the slicer selected, press Alt + C on your keyboard.
Using A Timeline

Change The Timeline Grouping
The first thing you’ll want to do with a new timeline is change the Date Grouping option. Here you can choose to group the dates in your data into days, months, quarters or years. This will affect how the timeline groups and filters your dates.
Select A Single Timeline Period
To select a single period in a timeline, you can click on the period. This will filter your data to only show dates in that period.
Select Multiple Adjacent Timeline Periods
To select multiple adjacent periods in a timeline, click on the first period then drag the cursor to the last item and release the click. This will filter your data to only show dates in the selected range.
With timelines you can’t select non-adjacent periods.
Adjust The Selected Timeline Period
You can use the Timeline Handles to either increase or decrease a selected range of dates. Click and drag the handles on the left or right of a selected timeline range.
Clear Selected Timeline Filters
Like slicers, timelines also come with a way to reset and clear out any applied filtering. This can be done using the filter icon in the top right corner of the timeline.
The same keyboard shortcut to clear filters also works with timelines.With the timeline selected, press Alt + C on your keyboard.
Slicer And Timeline Contextual Tabs
When you select a slicer or timeline, a new tab will appear in the ribbon for that object. These are contextual tabs and only appear in the context of a selected slicer or timeline object.
The Slicer tab and Timeline tabs contain a lot of the same options but there are a few differences.
Slicer Tab

The Slicer tab will allow you to:
- Change the slicer caption or open the slicer settings.
- Open the report connections for the slicer.
- Change the slicer style.
- Arrange, align or group the slicer.
- Customize the slicer button layout.
- Adjust the size of the slicer.
Timeline Tab

The Timeline tab will allow you to:
- Change the timeline caption.
- Open the report connections for the timeline.
- Change the timeline style.
- Arrange, align or group the timeline.
- Adjust the size of the timeline.
- Show or hide various elements of the timeline.
Hide A Slicer Or Timeline

You can hide slicers and timelines from the Selection window pane.
Select any slicer or timeline ➜ go to the Slicer or Timeline tab ➜ open the Selection Pane from the Arrange section.
- You can press the Hide All button to hide all the slicers and timelines in the current sheet.
- You can hide individual slicers and timelines by pressing the Eye Icon on the right side for that object.
Change Slicer Or Timeline Caption

The caption is the bit of text that appears in the top left corner of a slicer or timeline. You can change this to anything you want and it can include space characters.

You can change the caption in either the Slicer or Timeline tab. Enter the new caption in either the Slicer Caption or Timeline Caption section and press Enter.
Don’t Print Slicers Or Timelines

It’s possible to exclude slicers and timelines when printing your Excel reports.
Select the slicer or timeline which you don’t want to print ➜ right click ➜ select Size and Properties from the menu ➜ uncheck the Print object option.
This way, you can still use your slicers and timelines to filter your reporting, but they won’t show up when the report is printed.
Customize Slicer Buttons

You can customize the layout of your slicer buttons. You can change the button height, width and number of columns they appear in.
By default buttons appear in a single column stacked in a vertical fashion. The above example has increased the columns from 1 to 5 so the buttons appear horizontally.
The example also increased the button height and decreased the button width.

To customize your slicer buttons, select the slicer ➜ go to the Slicer tab ➜ Adjust the Columns, Height and Width in the Buttons section.
Slicer And Timeline Styles
Excel allows you to customize your slicer style and set a default style for the workbook.
Unfortunately, application level defaults are not possible.

Styles can be changed in the Slicer or Timeline tab.
- Click on the down arrow in the lower right corner of the styles section to access the selection of available styles.
- Click on any style to change style of the selected slicer or timeline.
- If you right click on a style, you’ll have the option to Modify, Duplicate, Delete or Set As Default.
- You can also create your own New Slicer Style.
When creating your own custom styles, it’s a lot easier to duplicate an existing style and then modify it rather than starting a blank new slicer style. After creating a custom style, you can then set it as the default style for any new slicers or timeline in the workbook.

When creating a new slicer style or modifying an existing one, you will need to go through the various Slicer Elements then click the Format button to customize that element.
Report Connections
Report connections is how you can manage which tables or pivot tables a slicer is connected to.
You can use the report connection to connect a slicer to multiple tables or pivot tables. This means you can use one slicer to control multiple tables or pivot tables.

You can open a slicer or timeline’s Report Connection menu from two places.
- Go to the Slicer or Timeline tab and select Report Connections.
- Right click on the slicer or timeline and go to Report Connections.

In the Report Connections menu, you can then select all the pivot tables in the workbook which you want to connect to the slicer.
Note, you can’t connect a slicer to a table and pivot table.
Slicer And Timeline Move And Size With Cells
When you insert, delete or resize cells this can resize or move any slicers and timelines on the sheet.
There are some option to prevent slicers from moving with cell changes.

Select the slicer or timeline ➜ right click ➜ select Size and Properties from the menu ➜ go to the Properties section. Here you can select from 3 different options.
- Move and size with cells.
- This is the default option.
- Your slicer will move if you insert, delete or change the width of a column to its left.
- Your slicer will move if you insert, delete or change the height of a row above it.
- Your slicer will resize if you insert, delete or change the width of a column underneath the slicer.
- Your slicer will resize if you insert, delete or change the height of a row underneath the slicer.
- Move but don’t size with cells.
- Your slicer will move if you insert, delete or change the width of a column to its left.
- Your slicer will move if you insert, delete or change the height of a row above it.
- Your slicer won’t resize when changing rows or columns underneath the slicer.
- Don’t more or size with cells.
- Your slicer won’t move or resize based on any changes to the rows or columns in the sheet.
Disable Resizing And Moving Slicers Or Timelines
Slicers and timelines are great but they’re even better when you lock them in place. This way a user can use them to interact with the spreadsheet, but won’t be able to move or resize them.

Select the slicer or timeline ➜ right click ➜ select Size and Properties from the menu ➜ check the Disable resizing and moving option under the Position and Layout section.
Slicer Options
Slicer Settings are available from the ribbon or right click menu.
- Go to the Slicer tab ➜ Slicer Settings.
- Right click on the slicer ➜ Slicer Settings.

There are a couple different options worth knowing.
- You can change the caption in the Slicer Settings or you can hide the slicer’s heading completely. Uncheck the Display header option and this will hide the caption, multi-select and clear filter buttons from the slicer.
- You can sort the order of the slicer buttons in Ascending or Descending order. If none of these orders suites your needs, you can also use a custom list for the sort order.
- Various options for displaying items in a field with no data are available.
Show Or Hide Time Elements
This is one of the major differences between the Slicer and Timeline tabs. The Timeline tab allows you to show or hide a couple elements in the timeline object.

Here you can either show or hide the Header, Scrollbar, Selection Label or Time Level selector for any timeline.
Conclusions
With slicers and timelines your Excel reports are going to look spectacular!
They are also going to add some nice interactivity to your static dashboards. It’s guaranteed, your boss is going to love them.
Are you using slicers and timelines yet?


 👉 Find out more about our Advanced Formulas course!


![6 Ways to Count Colored Cells in Microsoft Excel [Illustrated Guide]](http://cdn-5a6cb102f911c811e474f1cd.closte.com/wp-content/uploads/2021/08/Count-Coloured-Cells-in-Excel.png)

Useful and helpful site.
Simple language to understand with Icons
Thanks!
I am unable to “Disable Resizing And Moving” for my Timelines, the checkbox is grayed-out. Can you tell me how to enable it?
It seems to be a long standing bug in Excel.
I work for the government and our fiscal year runs from 1 October to 30 September. Is there a way to customize the Timeline to align quarters with the fiscal year?
You need to explore power pivot and a custom calendar for that.