A normal Excel sheet has cells that are 8.43 points in width and 15 points in height. This is usually about 64 pixels wide and 20 pixels tall.
If your text data is long, you can increase the cell width to fit the data length.
A better option might be to wrap the text to increase the row height so the data fits in the cell instead!
In this post you’ll learn 3 ways to wrap your text data to fit it inside the cell.
What is Text Wrap?
This means that if text is too long to fit inside its cell, it will automatically adjust to appear on multiple lines within the cell.
The data inside the cell will not change and no line break characters will be inserted. It will only appear to be formatted on multiple lines.

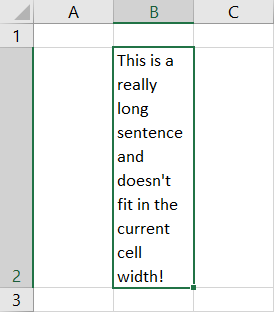
The above example you can see the text inside cell B2 extends well past the width of the cell and spills over cell to the right.
After the cell has had wrap text applied, you can see the row height has been adjusted to fit all the text.
Wrap Text from Ribbon
This is a very common action, so it can be found in the Home tab of the ribbon commands.

Wrap your text.
- Select the cell or range of cells to which you want to apply the wrap text formatting.
- Go to the Home tab.
- Press the Wrap Text command found in the Alignment section.
This will apply the formatting to your cells!
It’s a good idea to adjust the width of your cells to the desired size first as the height of the rows will be adjusted so all the text fits inside the cell.
Wrap Text Keyboard Shortcut
There is no dedicated keyboard shortcut for the wrap text formatting, but you can still use the Alt hotkeys for this.

Select the cells to which you want to apply wrap text then press Alt ➜ H ➜ W.
Certainly a quick and easy way to apply the formatting.
Wrap Text in the Format Cells Dialog Box
The format cells dialog box contains all the formatting options you can apply to a cell in your spreadsheet, including the wrap text option.

You can open this menu with a right click on the cells then choose Format Cells or by using the Ctrl + 1 keyboard shortcut.
Go to the Alignment tab in the menu ➜ Check the Wrap text option in the Text control section ➜ then press the OK button.
This is a great option when you want to apply wrap text and other formatting options at the same time.
Automatically Adjust Row Height to Fit Text

If your row height does not properly adjust to fit all the text and is either too small or too big, then you will need to adjust it.
You can do this manually by clicking and dragging the row but there is an easy option to auto-adjust the height.

Go to the Home tab ➜ select the Format options ➜ then select AutoFit Row Height from the menu. You can also do this by double clicking on the edge of the row heading.
The row height will adjust to the exact height needed to show all the text.
Manually Add Line Breaks to Wrap Your Text
The wrap text option will automatically format your text with line breaks based on the available width of the cell.
If you want to choose where the line breaks appear, then you can do this by manually adding line break characters to your text data.

Place the cursor in the text at the point where you want to add a line break then hold the Alt key and press Enter.
This will add a line break character into your text data and the data will appear on multiple lines in the sheet.
Remove Wrap Text
It’s just as easy to remove wrap text formatting as it is to apply it in the first place.
Remove Formatting
Select the cells from which you want to remove the formatting and then perform any of these methods.
- Go to the Home tab and press the Wrap Text command.
- Open the Format Cells menu and uncheck the Wrap text option in the Alignment tab.
- Use the Alt ➜ H ➜ W keyboard shortcut.
The exact same commands used to apply the formatting can be used to remove the formatting as well!
Remove Manually Added Line Breaks
If you’ve manually added line break characters to your text to achieve a wrapping effect, then you will need to remove them using a find and replace method.

Press Ctrl + H to open the find and replace dialog box.
Place the cursor in the Find what section and press Ctrl + J to add a line break character. Leave the Replace with section empty and then press the Replace All button.
This will replace all the line break character that you manually added by nothing thereby removing them.
Conclusions
Wrapping text is a great option for styling your spreadsheets and making them more readable.
It’s great too, because it’s very easy to do.
What’s your favourite method? Let me know in the comments!


 👉 Find out more about our Advanced Formulas course!

![6 Ways to Count Colored Cells in Microsoft Excel [Illustrated Guide]](http://cdn-5a6cb102f911c811e474f1cd.closte.com/wp-content/uploads/2021/08/Count-Coloured-Cells-in-Excel.png)


My best method is the keyboard shortcut. Thank you for sharing.